| INDEX | 1300-1599 | 1600s | 1700s | 1800s | 1900s | CROSS-ERA | ETHNO | |
| MISCELLANY | CONTACT | SEARCH | |
|
|
 |
 |
 |
 |
|
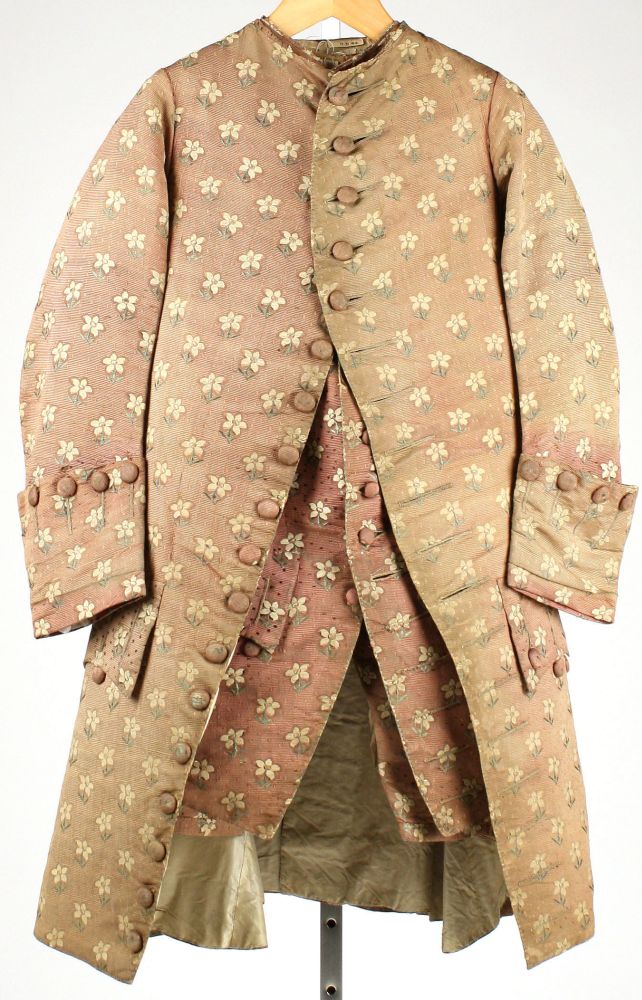
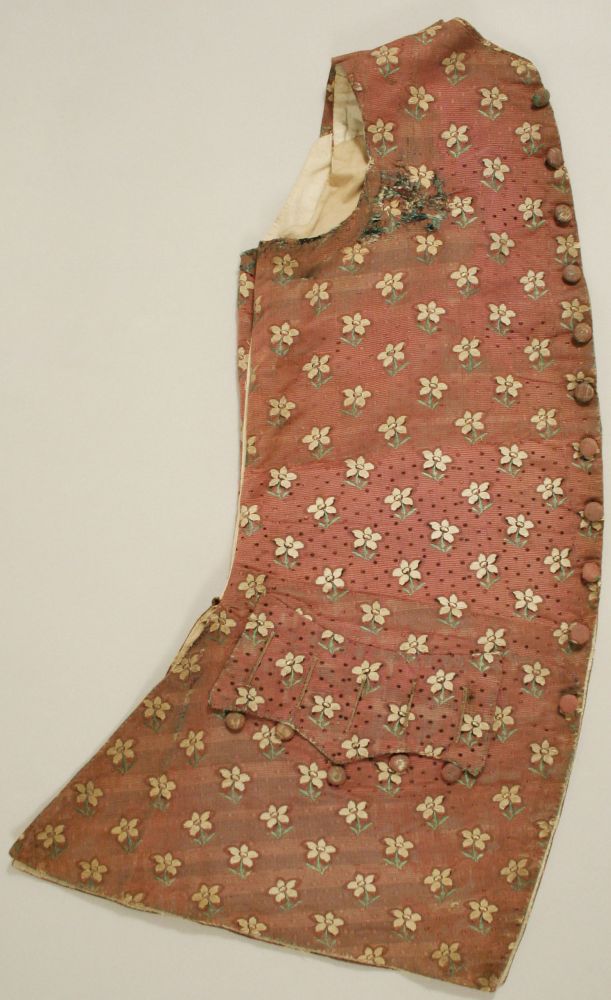
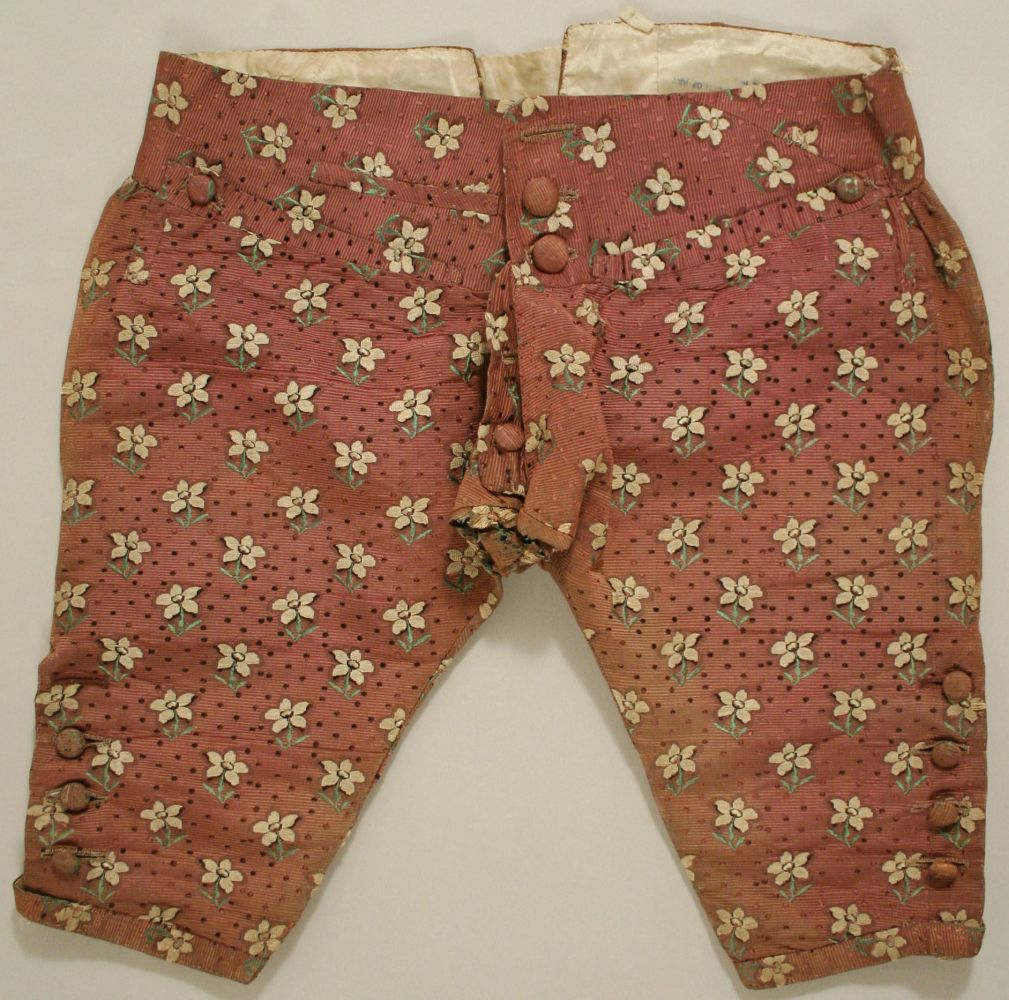
Silk suit c. 1740-60 |
This pattern is a selfmade combination of patterns found in Waugh and Costume Close Up with a bit of Garsault thrown in, draped onto Mr Guiea Pig, who was tall and slender. Here's a page on making a full-size pattern out of the diagram. Seam allowances are not included.
As with all patterns I make into diagrams, minor inexactness cannot be avoided, so you should always make a mock-up out of cheap fabric and fit it on the wearer. For instance, I cannot guarantee that the sleeve will fit into the armhole exactly or that both sides of a seam are exactly the same length. Please give generous seam allowances just in case.
The hem line of the justaucorps has probly suffered most. It should be a smooth curve, every point being 60 cm away fromt the small curve at waist level. If necessary, correct it in the full-size pattern. Give at least 5 cm seam allowance round the hem.
The curved sleeve seams may also be slightly off. The sleeve has two seams which, in constrast to modern suits, do not hide under the arm, because both halves of the sleeve are the same width. With the exception of the armscye/sleeve head, both pattern parts should be the same.
What i've left out in the pattern: A strip for the fly (3 x 17.5 cm), strips for the knee slits (3 x 20 cm) and the knee band (3 x 36 cm). Seam allowances to be added. In case of the knee slit, you should cut the strip in one with the back part of the breeches. Optionally, you can cut a wedge to be set into the slit at the back of the breeches.
For the fitting, note that 18th century suits don't fit the same way as modern clothing does. The upper sleeves and the torso seem too tight, the back and shoulders too narrow, the seat of the breeches too large. All of this is meant to be. A gentleman wasn't supposed to make any movements that the clothing didn't allow him to do – that would have been unelegant. Without the large seat, he wouldn't have been able to wear breeches that fit snugly over the thighs and sit in a saddle or on a sofa without discomfort.
Have the suit hug the figure closely, but without strain on the button holes. In the 18th century, a long, slender torso with not too wide shoulders – what we today would undiplomatically call a toast-rack slip of a man – was considered the height of beauty. So the shoulder should not extend beyond the natural shoulder, let alone be wadded as it would be in a modern suit. Speaking of shoulder: The shoulder seam, i.e. the one that connects front and back, is not at the top of the shoulder but behind it, slanted towards the arm. This is one of the marks of properly-made historical clothing vs. costume rental crap. Note that the waistcoat and coat are buttoned only across the stomach. If the front edges don't meet below and above, that's perfectly alright. Especially over the chest everything is left open to allow the shirt ruffles to peek out.
While fitting, the victim should stand straight, shoulders back. If the suit sits fine with this posture, but pinches when slouching, it fits as it is meant to fit: Like a woman's corset, the suit is meant enforce a straight posture by making any other posture uncomfortable. Most men I've seen wearing 18th century suits tended to take stances completely different from their everyday posture, and more like those seen in period paintings. Pride probably plays a role, but a well-fitted suit goes a long way in supporting it.
The breeches should reach so far below the knee so that the knee band slips half up over the knee when sitting, but not more. (cf: picture 1, picture 2) The dummies in the Fashioning Fashion exhibition all had too long legs, i.e. they wouldn't have been able to sit down in their breeches. When standing up, the knee band sits slightly below the place where the leg is as its most narrow, so as to only just hide the stocking band. In case of badly-made as-if suits, you often see the breeches bag around the knees – in this case, they are too wide and too long, while the knee band is OK. If the breeches fall all the way to the calf, they're too long and the knee band too wide. Just below the knee, the breeches should be only just wide enough that one can sit without discomfort. Only from the middle of the thigh up, where it's hidden under the waistcoat, it can become as wide as you like. The side seam should sit right on the side of the body. If it's too far back, the front is too wide. You can subtract from the front until the side seam meets the pocket flap, but not more. If the side seam ist too far in front, the front part should be enlarged in such a way that the pockes also become wider: Large pockets are never amiss. Remember that the pocket bags must also be enlarged.
If everything fits, you can cut the fashion fabric in earnest. To achieve a better fit and fabric economy (think of the flared skirts), you should mark and cut each part separately from the wrong side so that you only have to follow the lines when sewing. Do take care not to cut two left parts!
All parts of the coat and breeches and the fronts of the waistcoat are cut
twice in fashion fabric. The pocket is cut twice in the fold from the coat fabric
and, slightly smaller, from the waistcoat fabric. The waistband is not
cut in the fold, so add seam allowance at the centre back as well.
From the linen, cut the front of the waistcoat and the waistband twice, the
back of the waistcoat four times, and the pocket bags for breeches, waistcoat
and coat. From the lining, cut front, back and sleeves of the coat twice. Cut
the lining at the same time as the fashion fabric, sew the parts together soon,
and put them on a hanger or the dummy.
And finally the interlining, twice each. This is a rather complex matter because
the amount of interlining depends o the top fabric and the silhouette. How to
put it simply?
What you always need is interlining for the waistband and the front edges of
coat and waistcoat (about 6-10 cm wide, cut to the curved front edges), small
patches at the tops of the side slits, a strip along the top of the pockets
and back insert, and strips along the vertical edges of side slit and back insert.
Stiff linen should be enough.
The cuffs, if they are as large as in this pattern, should be further stiffened e.g. by using horse hair interlining instead of linen, or by smearing glue onto the linen interlining*. It just doesn't look right if they flop around.
If your fashion fabric has some stand (e.g. a medium-weight woolen), cut the
interlining for the front edges of the coat a little wider than mentioned above,
so that it reaches to the armhole. Below, you can have it curve towards the
front edge until it's the required 6-10 cm wide. This will allow you to stitch
the chest padding to the interlining, keeping it in place, without any stitches
through either top fabric or lining.
For a not very stiff top fabric (i.e. most modern silks), I recommend full interlining
for the fronts of coat and waistcoat. Since linen is heavy, use bedsheet-quality
cotton here. A pre-1750 suit with the typical flared skirts needs interlining
in the skirts. So if you have a not too stiff fabric and want flared skirts,
you need full interlining and additional skirt interlining. In
this case, I'd interline the top of the suit in cotton and the skirts in horse
hair – or simply glue the skirt part of the overall cotton interlining.
A wool coat with sparing linen interlining and linen lining is quite heavy, so if you can make it lighter by replacing two layers by one exra-stiff layer, go for it!
Next chapter: The breeches
*) This is an easy and even historically accurate way of stiffening linen interlining. The accuracy depends on the kind of glue, of course. In any case, it should not be water-soluble. Let the glue fully dry out before using the interlining.
Wednesday, 15-May-2013 23:53:13 CEST
Content, layout and images of this page
and any sub-page of the domains marquise.de, contouche.de,
lumieres.de, manteau.de and costumebase.org are copyright (c) 1997-2022 by Alexa Bender. All rights
reserved. See Copyright Page.

GDPO


This work is licensed under a Creative Commons License.
Content, layout and images of this page
and any sub-page of the domains marquise.de, contouche.de,
lumieres.de, manteau.de and costumebase.org are copyright (c) 1997-2022 by Alexa Bender. All rights
reserved. See Copyright Page.

GDPO


This work is licensed under a Creative Commons License.