| INDEX | 1300-1599 | 1600s | 1700s | 1800s | 1900s | CROSS-ERA | ETHNO | |
| MISCELLANY | CONTACT | SEARCH | |
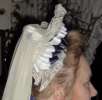
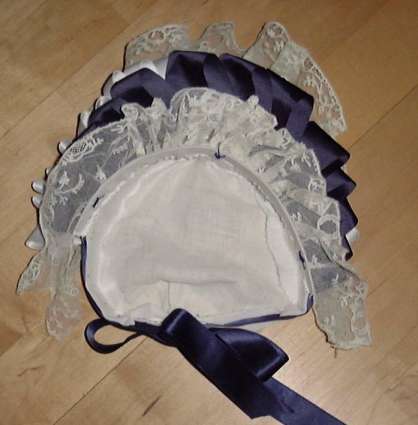
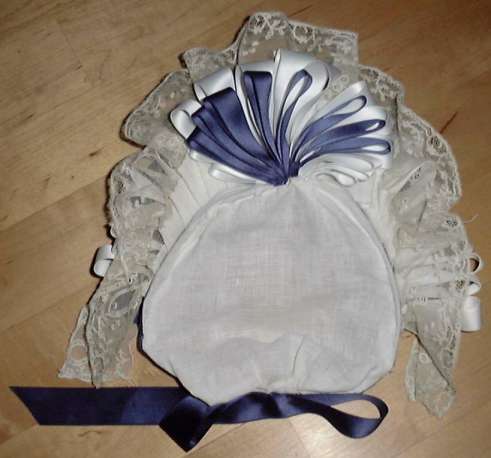
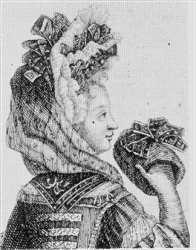
pictures: from the front, from the back, from above
So you think that material on later 17th century clothing is scarce? Then you haven't tried a fontange yet. There's a only couple of engravings, rarely adequate for deducing the construction, and most of these depict the high, narrow fontanges of the 1690. I was trying to make a 1680s fontange, though. My only sources consisted in an engraving or two obtained from www.kipar.org. In other words, I had to wing it.
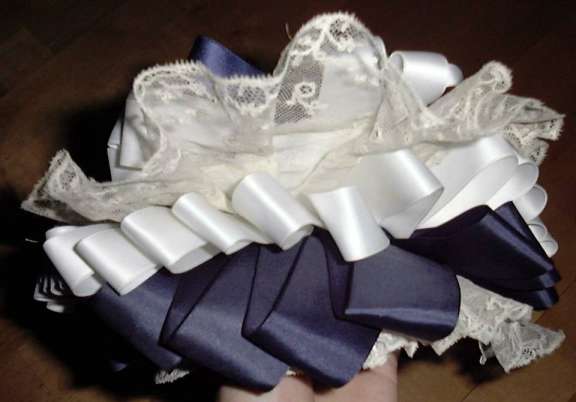
The apparently most popular style of the 1680s was called fontange à la sultane, consisting of several "layers" of bows and lace and a diaphanous shawl hung across them that often had a pattern of stripes. The engravings show alternating fair and dark layers, the dark ones being ribbon bows, the fair ones either bows or lace. The shawl is either placed over one of the layers or over the cap itself.
Materials used: white shirting linen for the foundation, white and dark blue satin ribbon, blue taffeta ribbon, antique Mechlin lace and ivory silk chiffon, and tons of starch.
I cut a square of linen and pleated the opposing sides so that I got a circular edge onto which I sewed a piece of ribbon. On one of the gathered sides, which was to become the neck end, I made the ends of the ribbon into a large bow. Now I had to put all the decoration on the other, the top end. The first question was how to make all of it stand up - the satin ribbon turned out to be so heavy and soft that it insisted on falling over. I made three overlapping rows of white-blue white ribbon, then I had enough of its tendencies to flop. Starch didn't help here, by the way.
As I'd known that I would have to make a number of layers of a certain depth, I had put the first (back) rows of bows onto the linen of the cap (there was only so much space on the ribbon around it), which was so soft as to offer no support whatsoever to the heavy ribbon bows. In order to support them, I cut a piece of cardboard that went from ear to ear, set it against the inside of the cap and cenircling ribbon, and covered it over with linen. As it didn't go all around, it pulled the cap into a half-circle shape. Damn. But too late to start over, I had to get finished.
Now the engravings suggested that it was time for a layer of lace. According to the engravings, the lace is highest on top of the head, tapering towards the ears, but my pieces of lace were an even width. I cut a ribbon of linen somewhat longer than the piece of lace and made it to taper at both ends so that one lengthwise edge was straight and the other curved, then attached the lace to the curved edge so that about 5 cm of it stuck out beyond the ends of the linen. I rinsed this in a strong solution of starch, ironed it dry, and pleated it so that it fitted between the ears, the pleats getting shallower towards the edges and sticking up vertically rather than radiating.
Next was to be a row of ribbon - I rinsed the part I had not yet used in a solution of starch (instead of a cap of starch on 3 litres of water, I used 3 caps on one litre) and ironed it until it was dry. Be careful: Starch can leave a sticky residue on the iron, but if you don't iron it while it's still wet, you won't get the full effect, in my experience. It was barely enough to prevent the ribbon from lying flat. As I had almost nothing of the encircling ribbon left to sew the bows onto, I laid them diagonally, which helped to make them stay upright.
Then I had reached the foremost edge of the cap, but according to the engravings, there were still some layers left to go. I cut another piece of cardboard, one edge straight and the other curved, covered it in linen and sewed the straight edge to the existing piece of cardboard. Onto that went a row of blue ribbon bows, this time of taffeta as I'd (a) run out of satin ribbon and (b) decided that satin was too heavy and soft. The taffeta was also heavily starched and attached diagonally, both to save space and because it prevented the bows from falling over. In front of that went the last layer, again made of lace. The ends of the lace were to reach the ears; anything in between it was pleated so that the pleats were deepest in the middle. This last layer was made to lean forward so much as to almost lie horizontally.
At last, I used buttonhole thread to make small loops just off the front edge, on the inside, through which to stick the hairpins which would hold the fontange in place.
I had made a scarf out of two widths of cream silk chiffon the edges of which I had rolled to neaten them, then sewed them together along the short edges. This scarf I pinned to the fontange behind the first (i.e. hindmost) layer of lace, in front of the three overlapping layers of ribbon in back - to hide them, in fact, because of their tendency to fall over. The scarf either fell behind my back or over my shoulder, just as I liked it. If I wanted it out of the way, I lightly knotted the ends in front as suggested by period engravings.
What I have learned from this...
Content, layout and images of this page
and any sub-page of the domains marquise.de, contouche.de,
lumieres.de, manteau.de and costumebase.org are copyright (c) 1997-2022 by Alexa Bender. All rights
reserved. See Copyright Page.

GDPO


This work is licensed under a Creative Commons License.